Installation macOS - Detail Instructions
Prerequisites
- The device is connected to the network of the University of Basel (internal university network address via LAN or Wi-Fi and VPN)
- Administrator permissions are required
- Username and password of your unibas-account must be known (e.g. unibasel\musterh)
- The operating system must be currently supported by Apple. To update a macOS device, follow these instructions: Link
Step 1

Install the latest PostScript printer driver from Canon for your operating system by downloading it from the official website: Link
Step 2


Select the section "Printer & Scanner"
Select "Add Printer, Scanner or Fax..."
Step 3
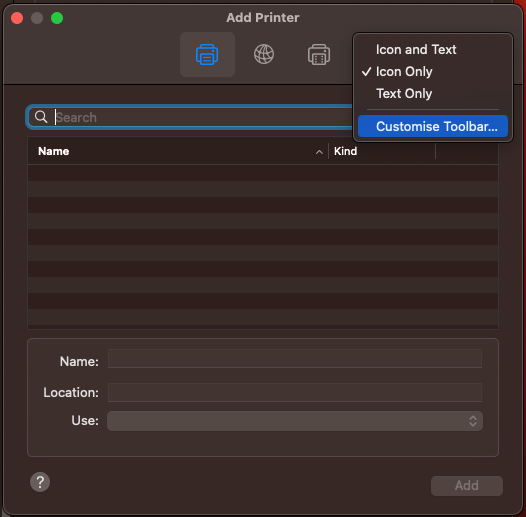

Right mouse click in the symbol bar - Customize symbol bar
Use the left mouse button to move "Advanced" to the "Toolbox" and close the box.
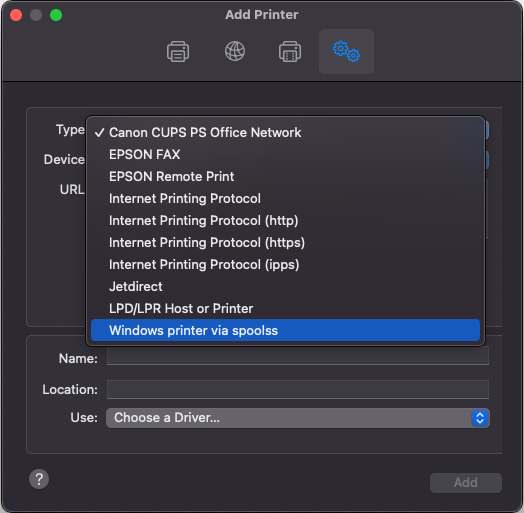
Select "Advanced" and select the Type "Windows printer via spoolss".
Step 4
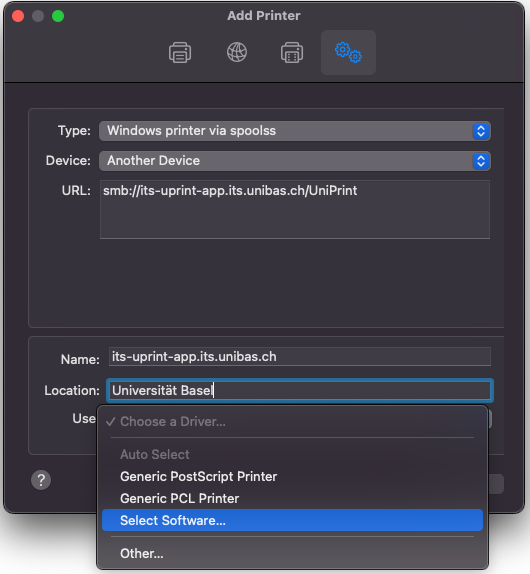
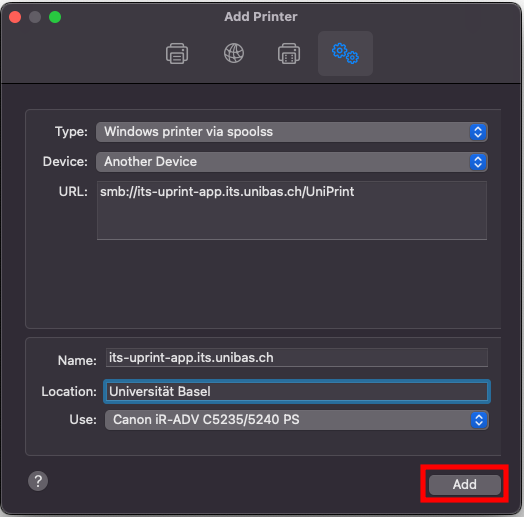
Complete the URL path with smb://its-uprint-app.its.unibas.ch/UniPrint
Enter the name its-uprint-app.its.unibas.ch
In Use, select "Select software...".
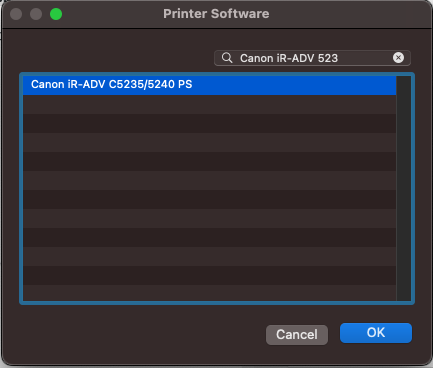
Search in the upper search field for "Canon iR-ADV 5235/5240 PS" and select the corresponding driver
Select "Add"
The printer will now be installed
Step 5

This example shows how to print for the first time in Microsoft Word.
Choose the printer: "its-uprint-app.its.unibas.ch
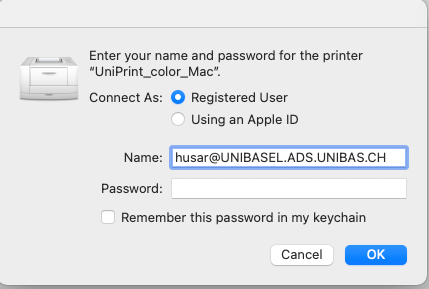
Enter username and password.
The username must be entered in this format:
<Username>@UNIBASEL.ADS.UNIBAS.CH
or
UNIBASEL\<Username>
Save the password to the keychain.

The password will be stored in the keychain. You need to change the password of your university account once every year and the stored password won't be valid anymore. Printing won't be possible after a password change.
Delete the entry in the keychain after a password change. After deleting the keychain entry the system will ask you for your new password.
Step 6


Deleting an entry in the keychain
- Administrator rights might be needed on the device.
- Search for "Keychain" using Spotlight.
- Open the Keychain Access.app.
- Use the searchbar in the top right corner and search for «its-uprint». Start the search by pressing Enter.
- Select all found entries.
- Delete all selected entries by pressing the «Delete» key or using «Edit» -> «Delete».
